Introduction
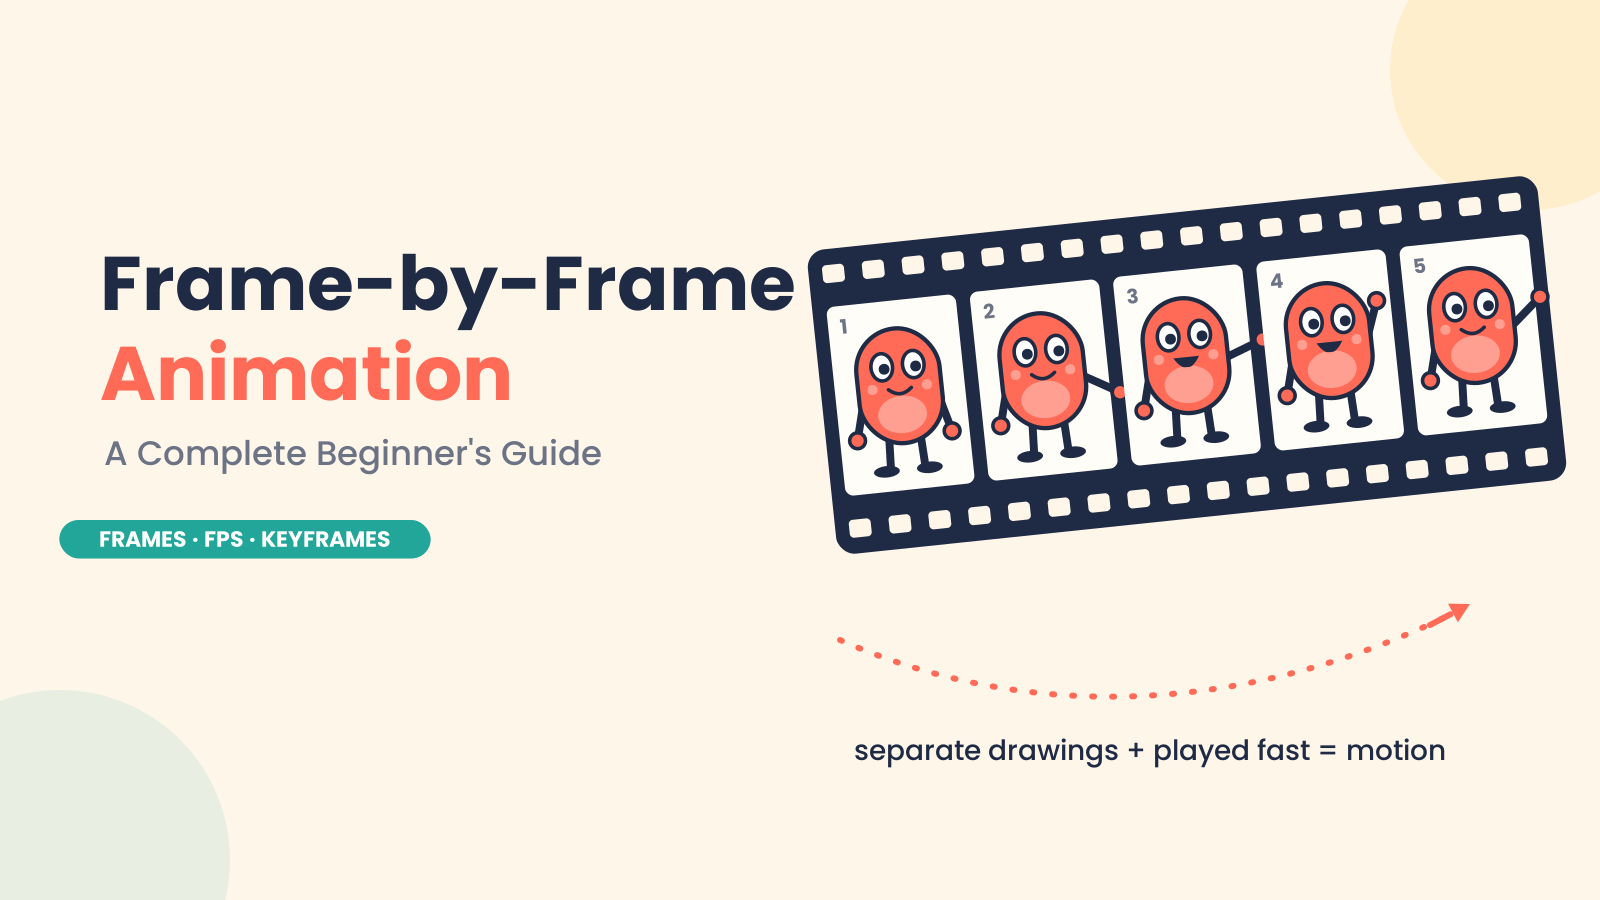
Frame-by-frame animation is one of the oldest and most expressive ways to produce movement. Here, an animator draws each moment of an action separately. When these drawings, or frames, are shown rapidly, one after another, they give the illusion of motion.
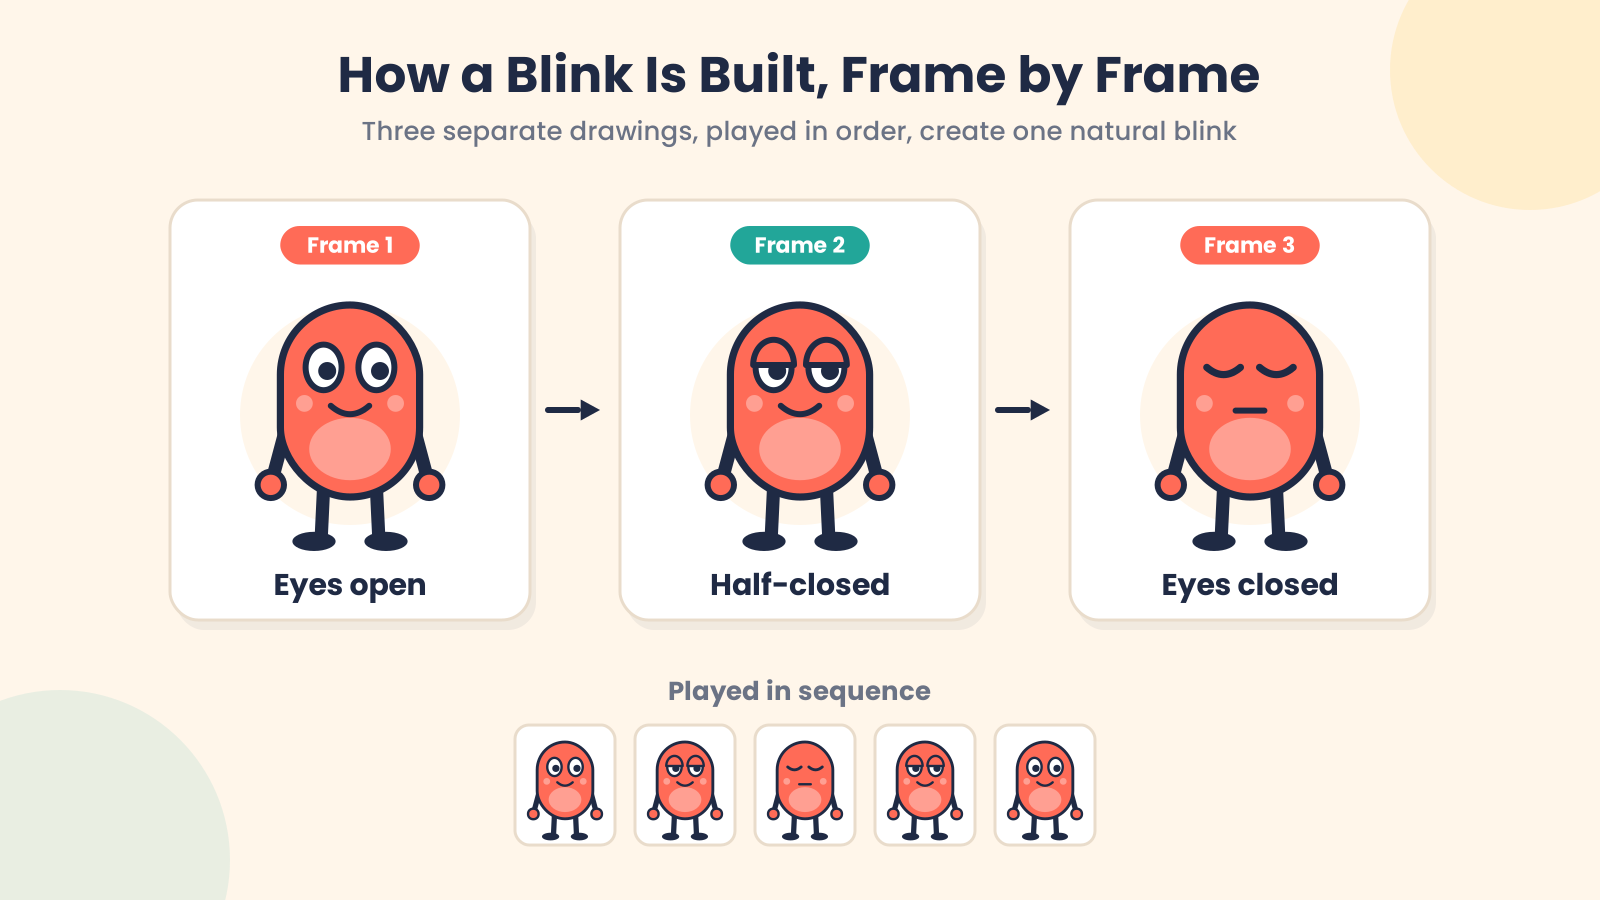
Imagine a character blinking. One frame is eyes open, one frame is eyes half-closed, and one frame is eyes closed. The blink looks natural when the frames are played in sequence. It’s the same for a waving hand, a bouncing ball, or a character raising their arm.
In 2D animation, this technique is often used where every movement is carefully built frame by frame. It takes time and patience, but it gives the animator a great deal of control over timing, expression, and personality.
Even today, frame-by-frame animation is still relevant. The basic concept remains the same: separate images create movement when played in order. However, modern software has accelerated the animation workflow. This is why this method is used by beginners, professional animators, and studios to produce expressive and memorable animation.
Table of Contents
What Is Frame-by-Frame Animation?
Frame-by-frame animation is a technique where movement is created by drawing or changing each frame individually. The animator does not depend on automatic movement. However, the animator makes separate images for different moments of an action.
A frame is a still image that is used in animation. When you play lots of frames fast in order, our eyes see them as movement.
FPS, or frames per second, is the number of frames displayed in one second. For example, 24 FPS stands for 24 frames per second.
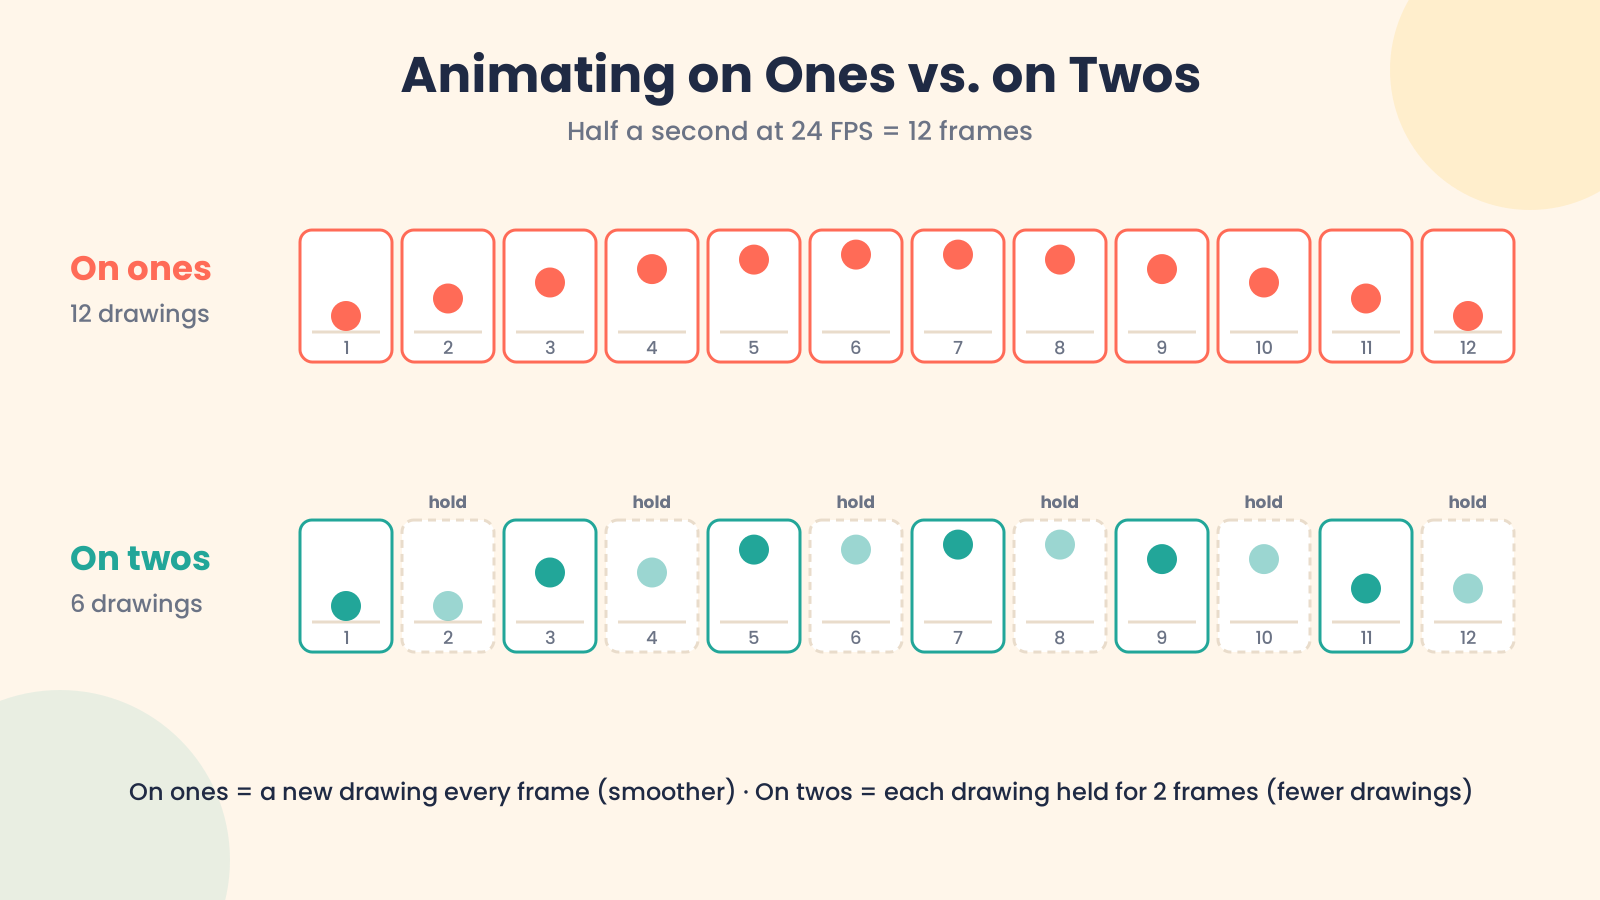
Animators also use on ones and on twos. Animating on ones means each drawing appears for one frame, and this makes for a smoother motion. Animating on twos means each drawing two frames. This uses fewer drawings, but still looks natural in many types of 2D animation.
A Little Bit of History: Where Frame-by-Frame Animation Began
Frame-by-frame animation began with artists drawing movement by hand, one image at a time. Each drawing was slightly different from the last. When those drawings were shown quickly in sequence, the character or object appeared to move.
One of the first animators to help prove the power of this technique was Winsor McCay, especially with his animated film Gertie the Dinosaur in 1914. But it was Walt Disney and the Disney studio that made animation frame by frame really popular around the world. Disney used this method to create expressive characters, smoother movement, and emotional storytelling in animation.
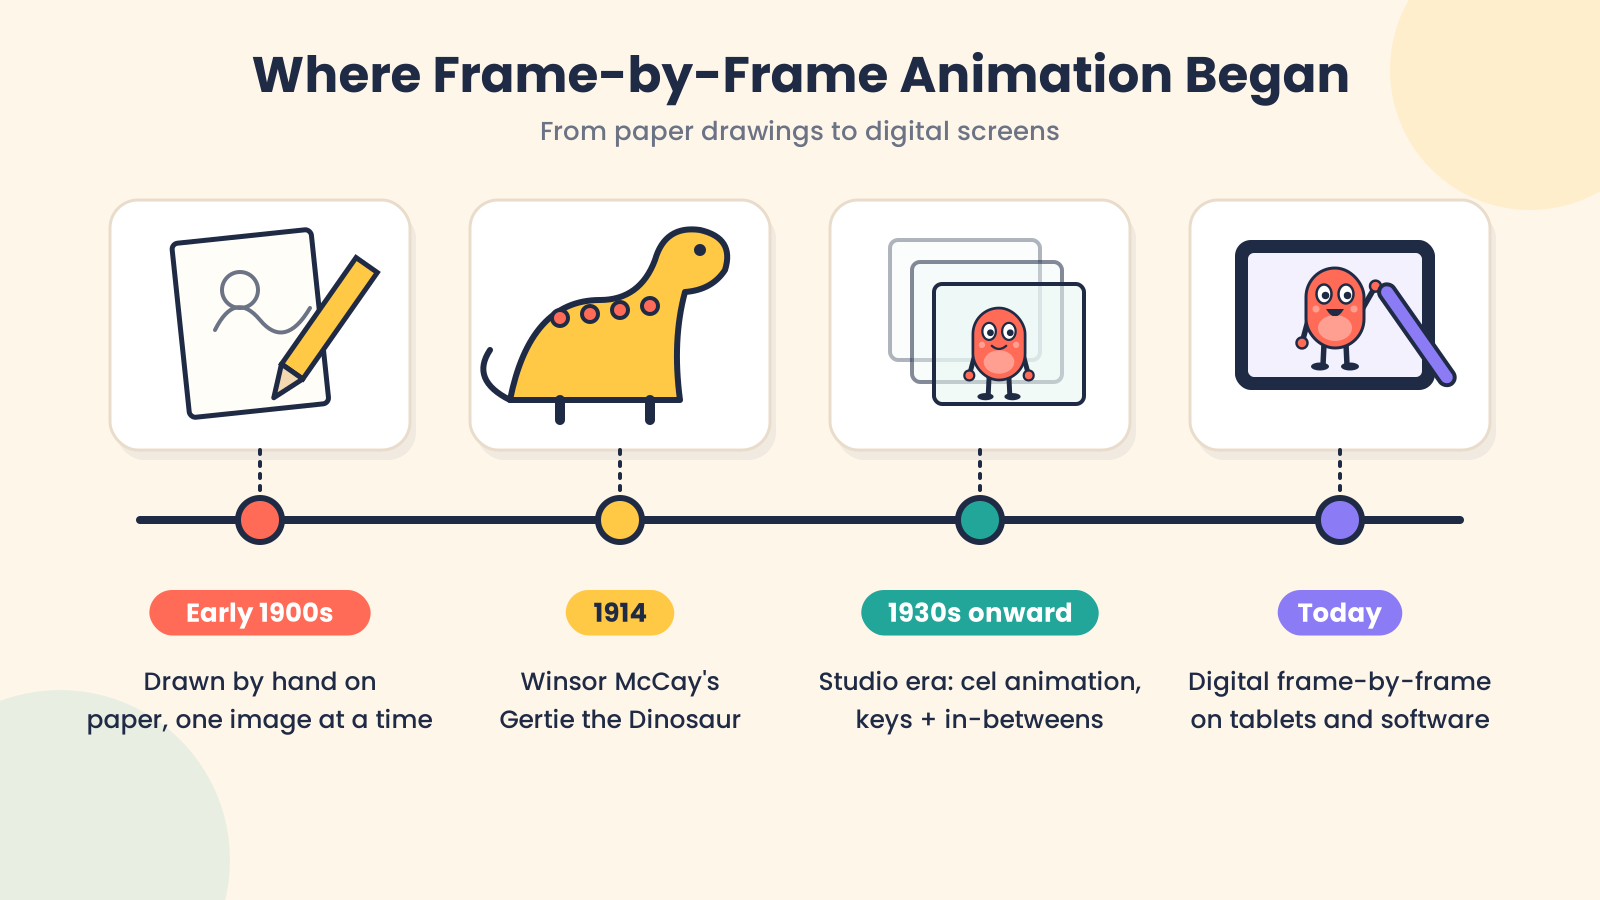
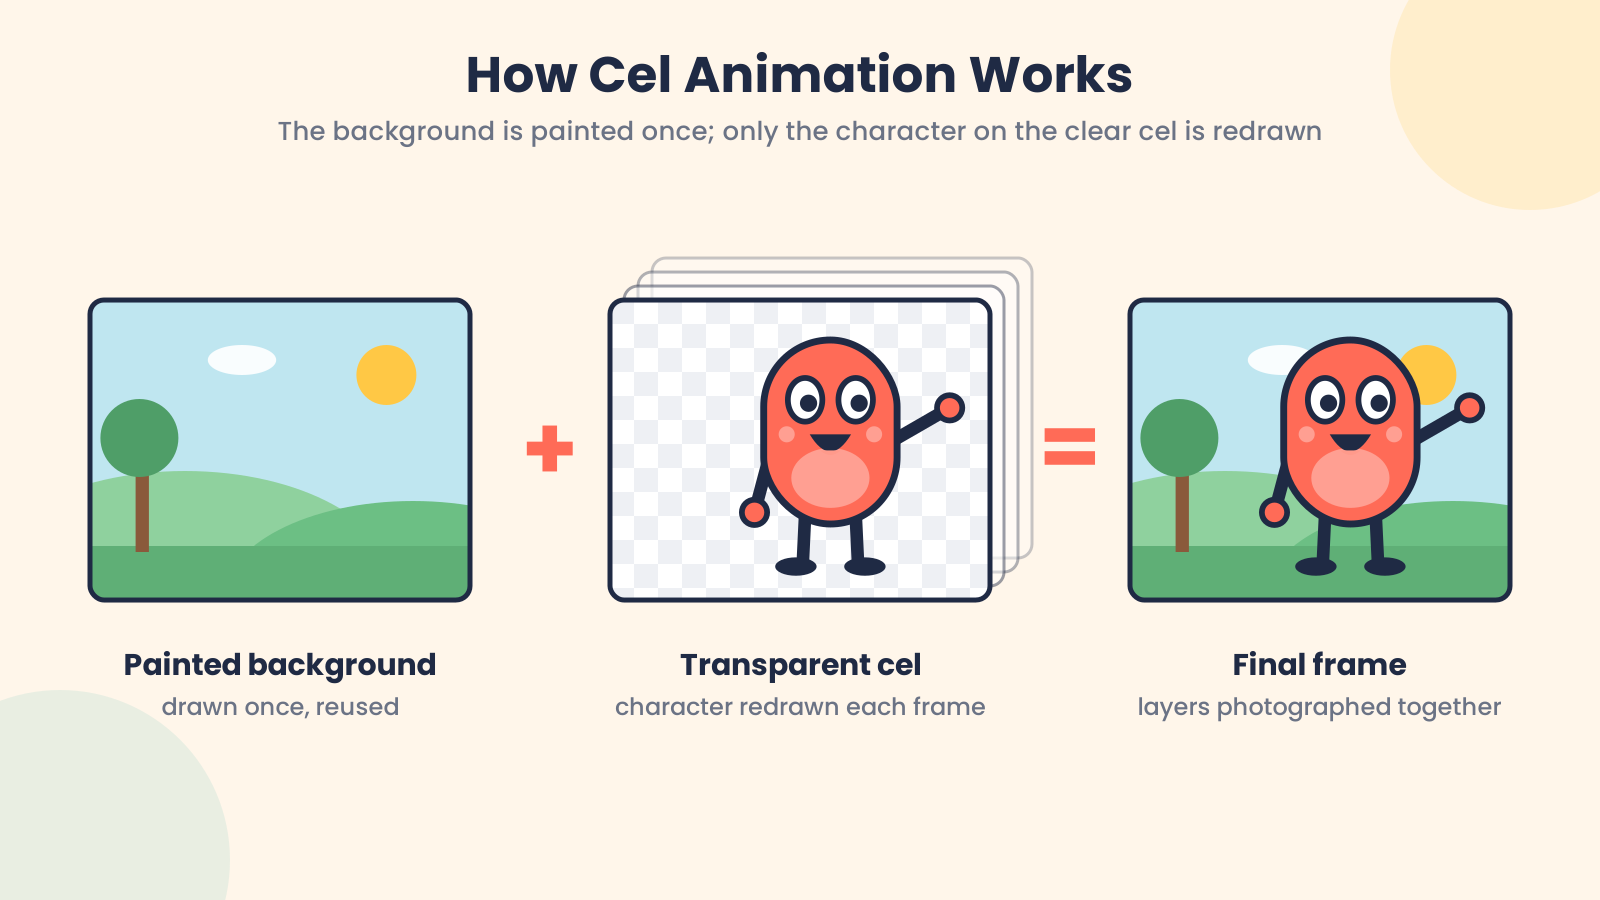
This process came to be called traditional animation. In early studios, artists first sketched scenes on paper. Later, many productions used cel animation, where characters were painted on transparent sheets (called cels) that were laid over painted backgrounds. This avoids redrawing all the background again, and instead reduces background redraws.
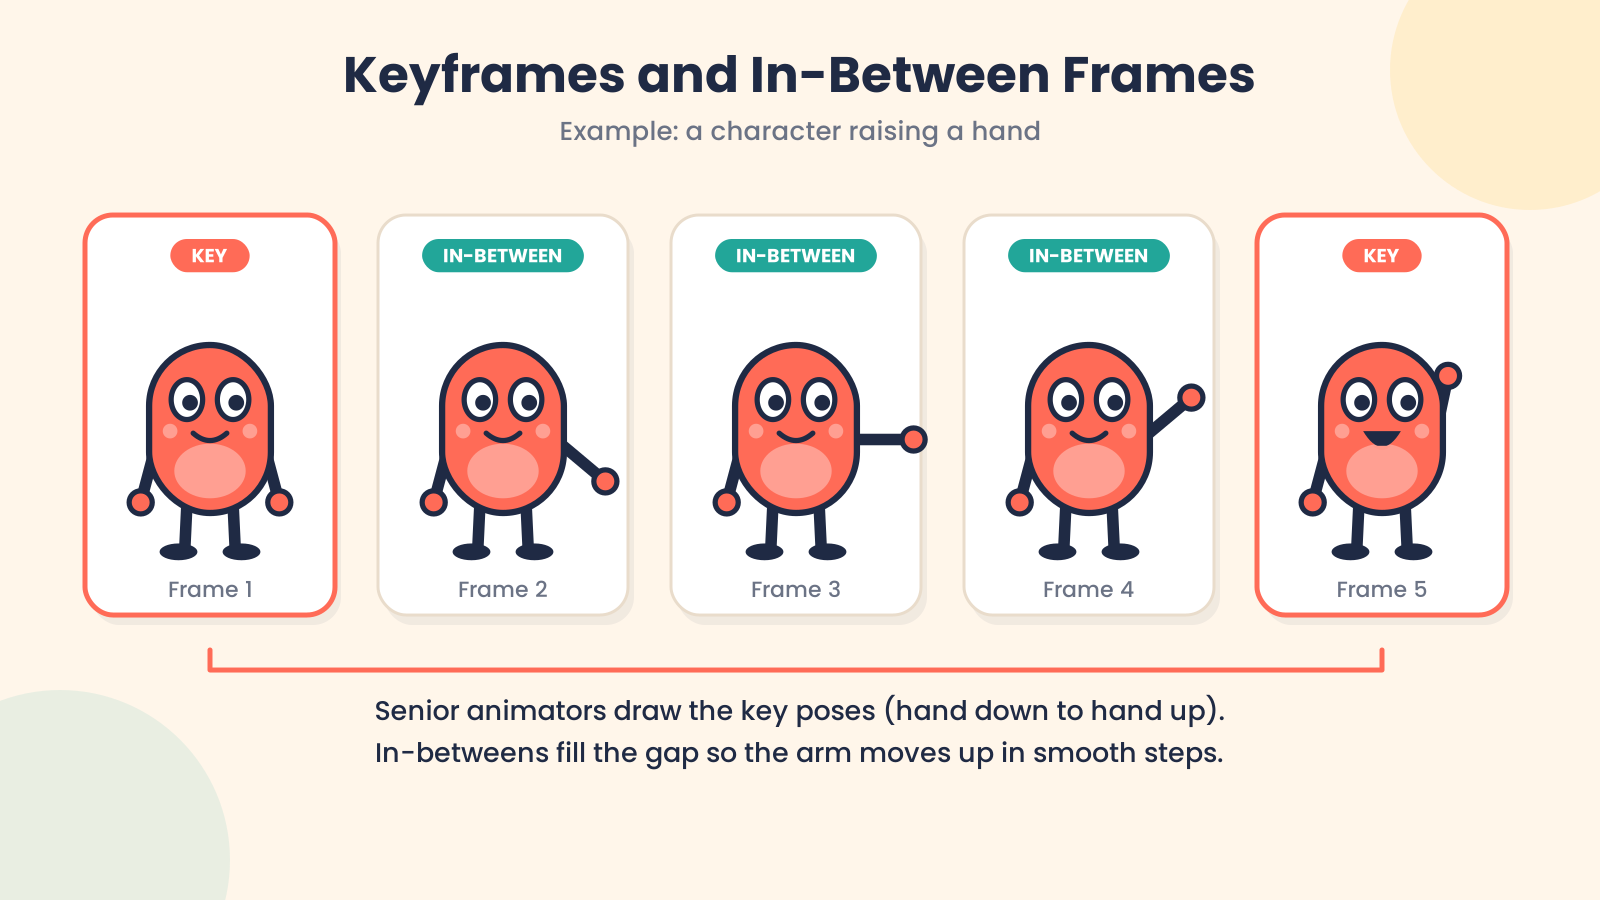
As animation production grew, studios developed a more systematic workflow. The senior animators drew the key poses, called the key drawings or keyframes. Then other artists would draw the frames in between to smoothly connect those poses. This meant the animation worked faster and looked clean and natural.
Today, most frame-by-frame animation is created digitally, but the principle is the same. Whether the animator is drawing on paper or using software, movement is still built frame by frame. The tools have changed, but the principle of frame-by-frame is still important in 2D animation.
Types of Frame-by-Frame Animation
Traditional Hand-Drawn Animation
The classic form of frame-by-frame animation is traditional hand-drawn animation. This technique involves drawing each frame by hand. Generally, the key frames of the action are drawn first.
Important poses are called keyframes. Then artists draw the in-between drawings to bridge one key frame to the next. For example, a character may raise a hand. The keyframes may show the hand down and then fully raised. The intermediate frames show the arm moving up in steps.
This method is very similar to classic 2D animation and was used in many old animated films and cartoons.
Digital Frame-by-Frame Animation
Digital frame-by-frame animation follows the same basic process, but the drawings are made directly inside animation software. Animators don’t draw on paper anymore. They draw on a tablet or computer screen.
Digital tools make the animation workflow easier. Animators can layer, undo, copy frames, adjust timing, and see the movement right away. Onion skinning and similar techniques help, providing a faint image of previous and next frames so you can draw smooth movement.
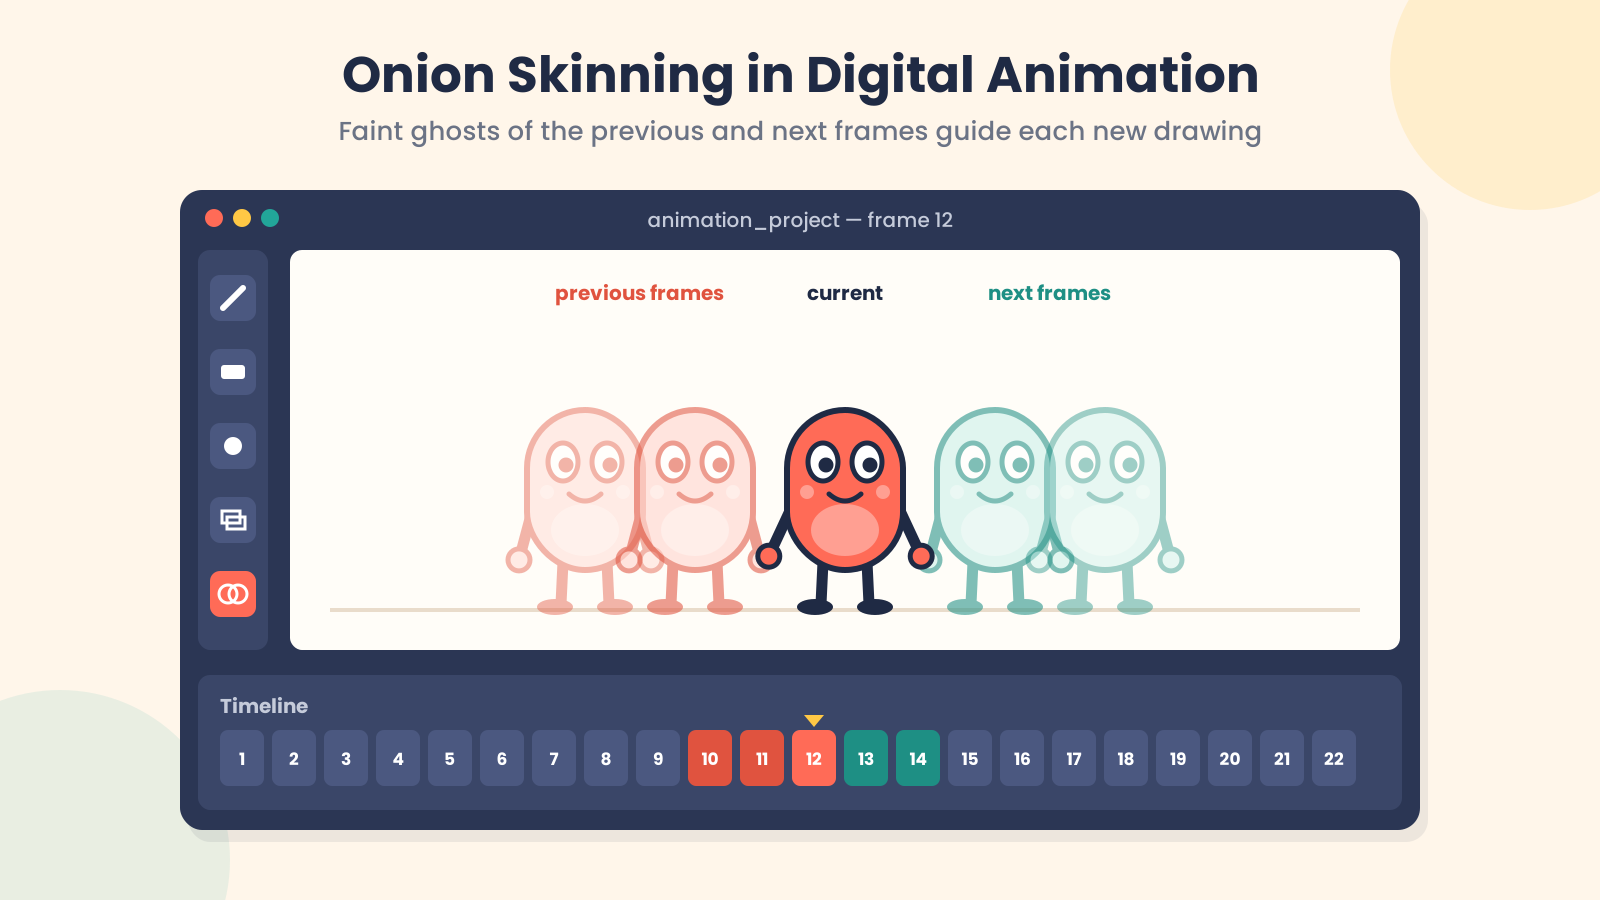
The process is still frame by frame, but it is faster and more flexible because you don’t need physical paper or cells.
Stop-Motion Animation
Frame-by-frame is also used in stop-motion animation, but it uses real objects instead of drawings. Animators move puppets, clay models, toys, or objects a fraction of an inch, then take a picture. They move them again and take another picture.
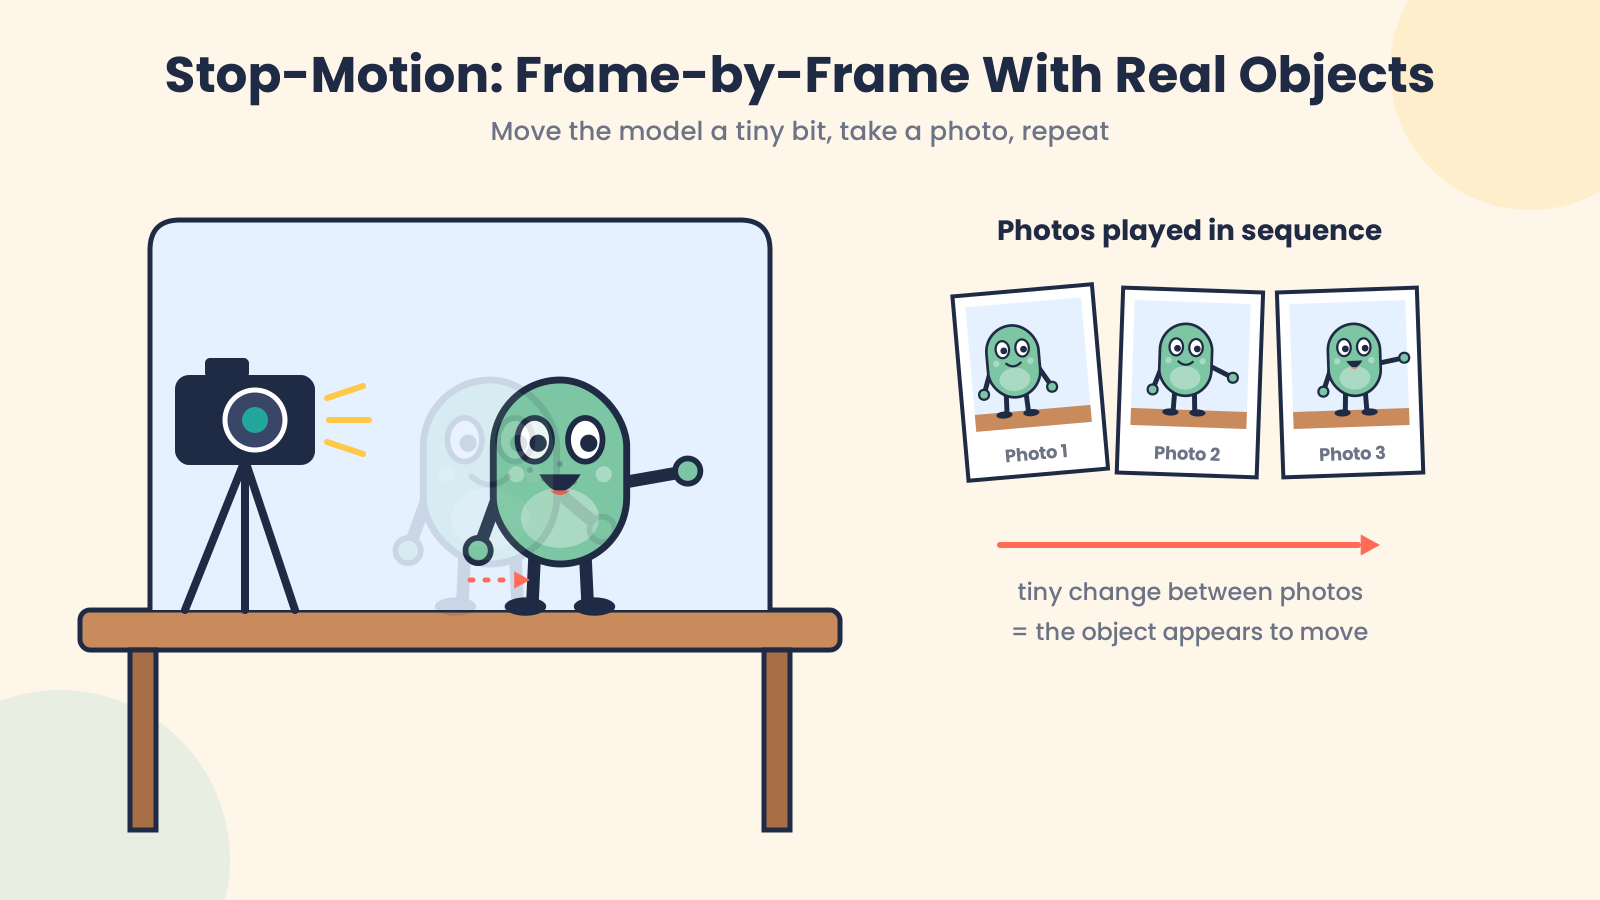
When all those pictures are shown one after another, the object looks as if it moves by itself. The medium is different from hand-drawn or 2D digital animation, but the idea is the same: small changes from one frame to the next create motion.
Frame-by-Frame Animation vs. Tweening
You can create motion with frame-by-frame animation or with tweening. The process behind each is quite different.
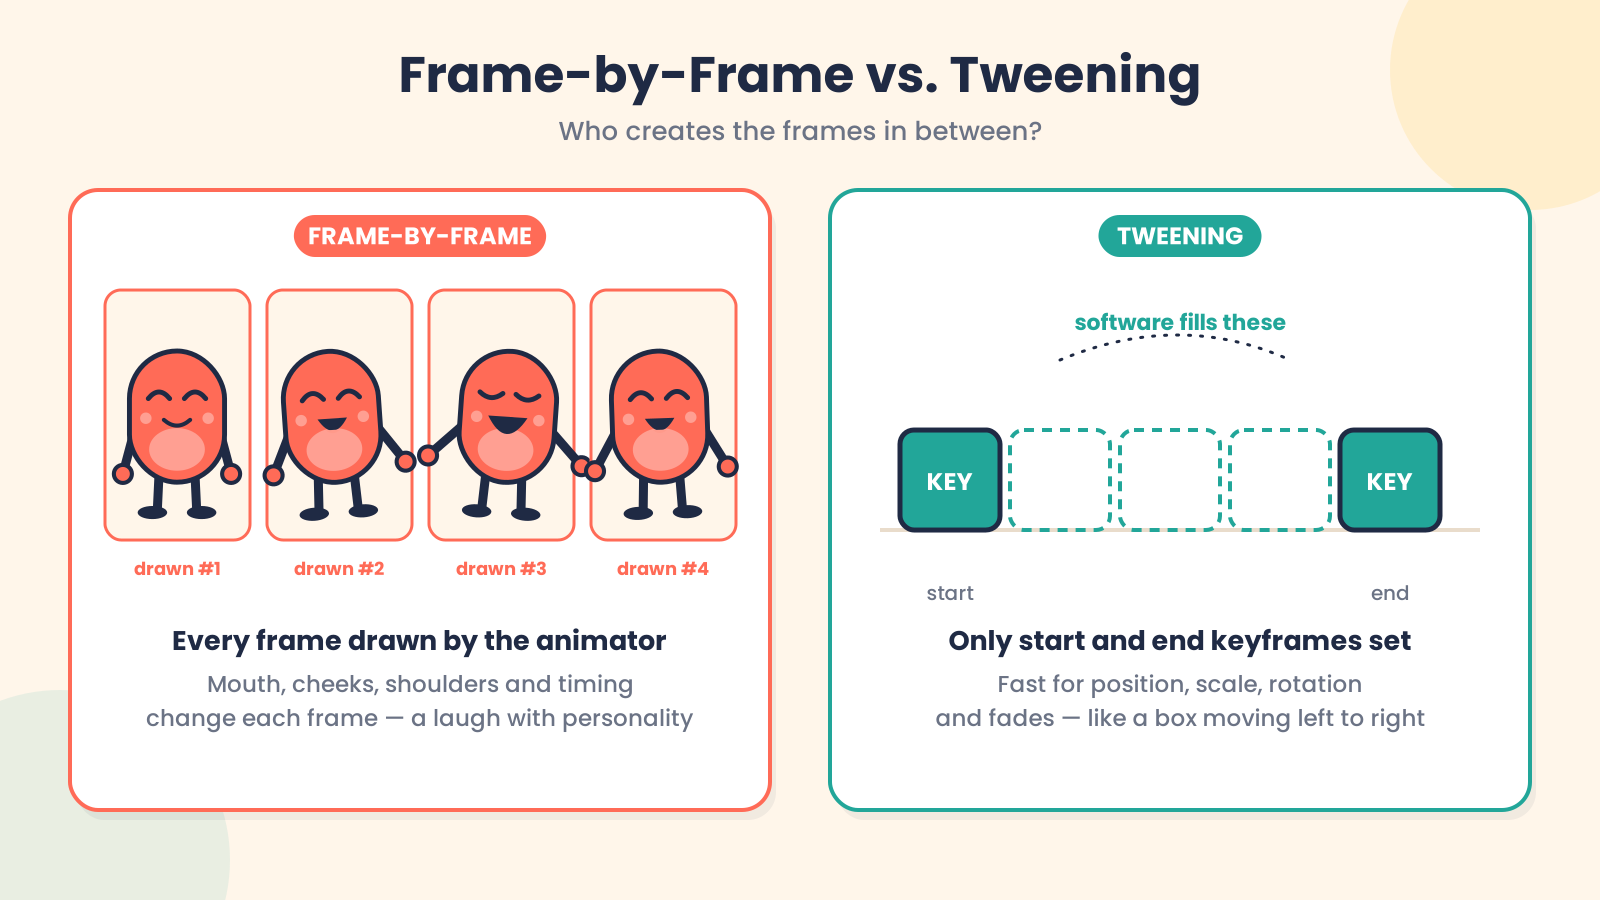
In frame-by-frame animation, the animator works on each individual frame. This allows you much more control, especially with detailed or expressive movement. For example, the animator can change the mouth, cheeks, shoulders, head movement, and timing frame by frame when a character is laughing. These small details add individuality to the character and make the action seem more organic.
Tweening is another matter. The animator sets a start and end keyframe, and the software fills in the motion between them instead of moving every single frame. Tweening is very quick when it comes to actions, like moving an object, making it bigger or smaller, turning it around, or making it appear and disappear.
For instance, if a box has to go from one edge of the screen to the other, the animator just has to say where it starts and where it finishes.
The software fills in the motion in between.
So frame-by-frame animation is better if you want more control and expression. Tweening is useful for simpler motions that can be done more efficiently.
| Point | Frame-by-Frame Animation | Tweening |
| How movement is made | Each frame is drawn or changed manually | Software creates movement between keyframes |
| Control | More control over expression and complex motion | Less control over small natural details |
| Speed | Takes more time | Faster for simple actions |
| Best for | Hand waves, facial expressions, character acting, organic motion | Position, scale, rotation, fade, simple object movement |
| Simple example | Drawing each stage of a hand wave | Moving an object from left to right using two keyframes |
How to Create Frame-by-Frame Animation
A simple animation workflow makes it easier to create frame-by-frame animation. You don’t have to start by creating a complicated scene. Beginners should start with a short action like a bouncing ball, a character turning their head, or a simple jump.
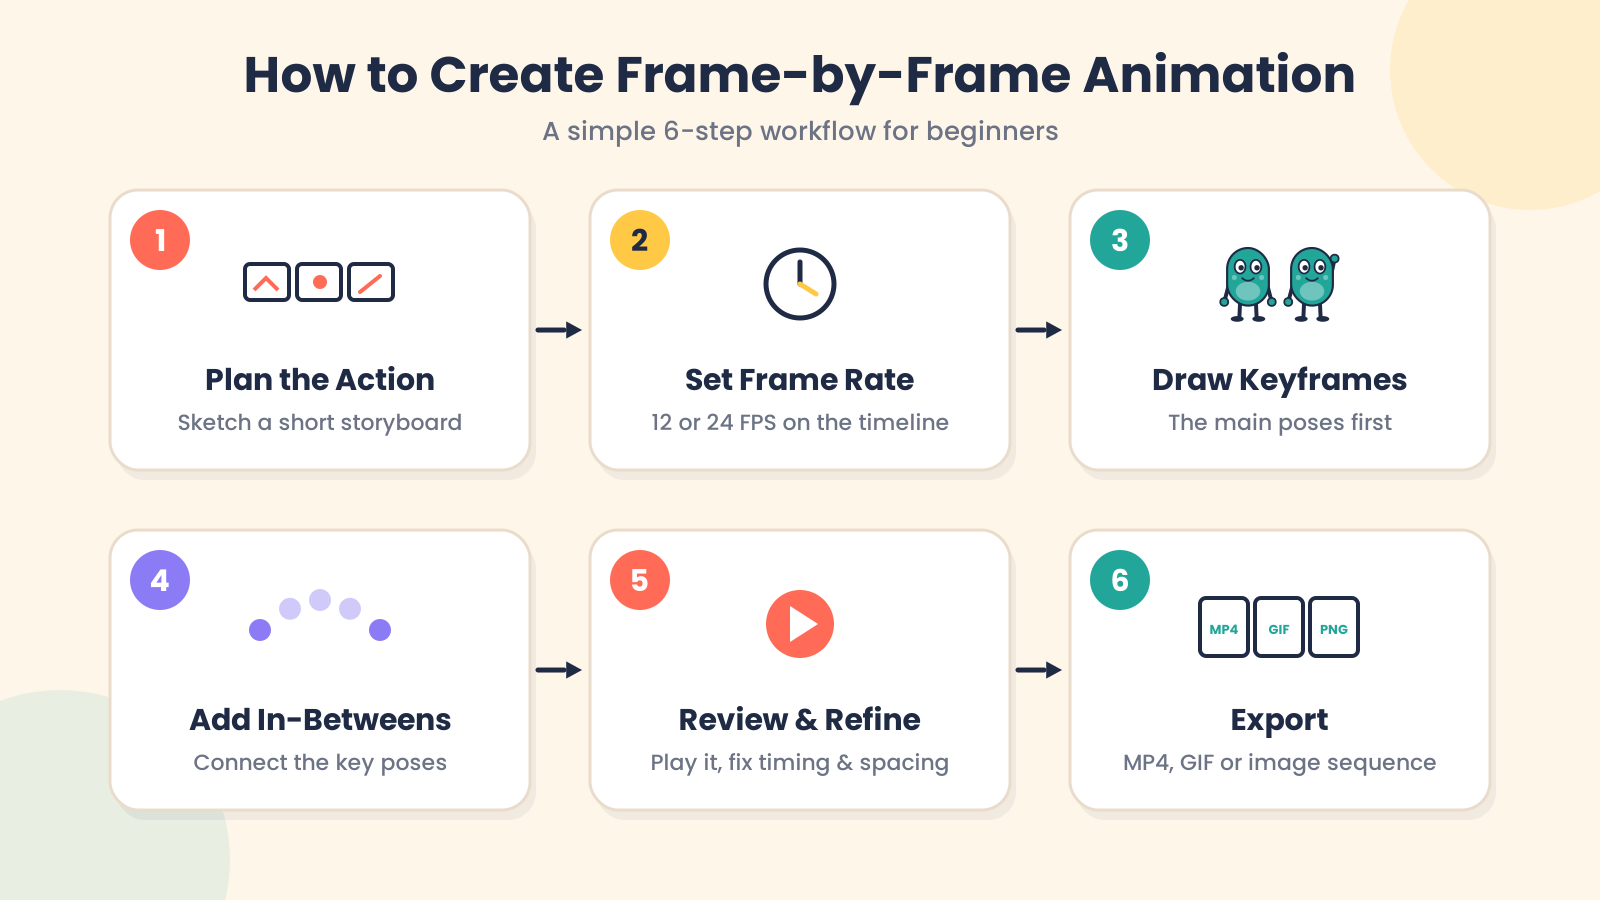
1. Plan the Action
First, select the movement you want to animate. If you are just starting out, keep it short and clear. It is easier to control a short action than a long scene with many moves.
You can do some rough sketches or a small storyboard to get the beginning, middle, and end of the action. This will help you avoid confusion when you start to draw the actual frames.
2. Set the Frame Rate and Timeline
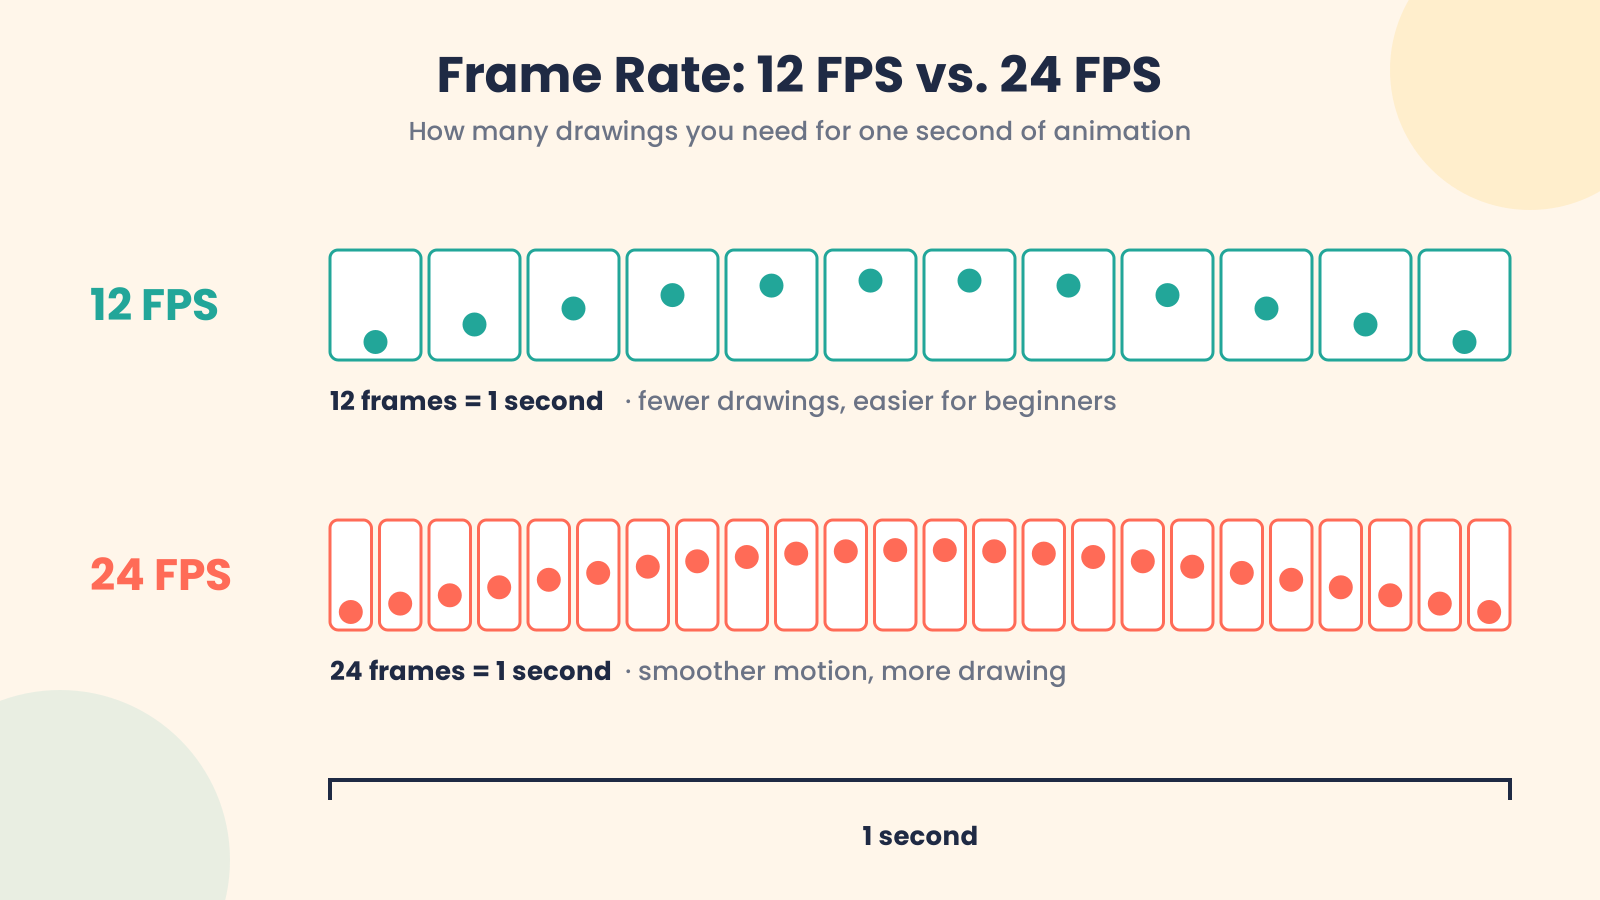
Frame rate is how many frames are displayed in a second of animation. Usually, it is written in FPS, or frames per second.
12 FPS and 24 FPS are standard frame rates. 12 FPS means you need 12 frames to make one second of animation. At 24 FPS, you need 24 frames for 1 second. A higher frame rate can make movement smoother, but also means more drawing.
3. Draw the Keyframes
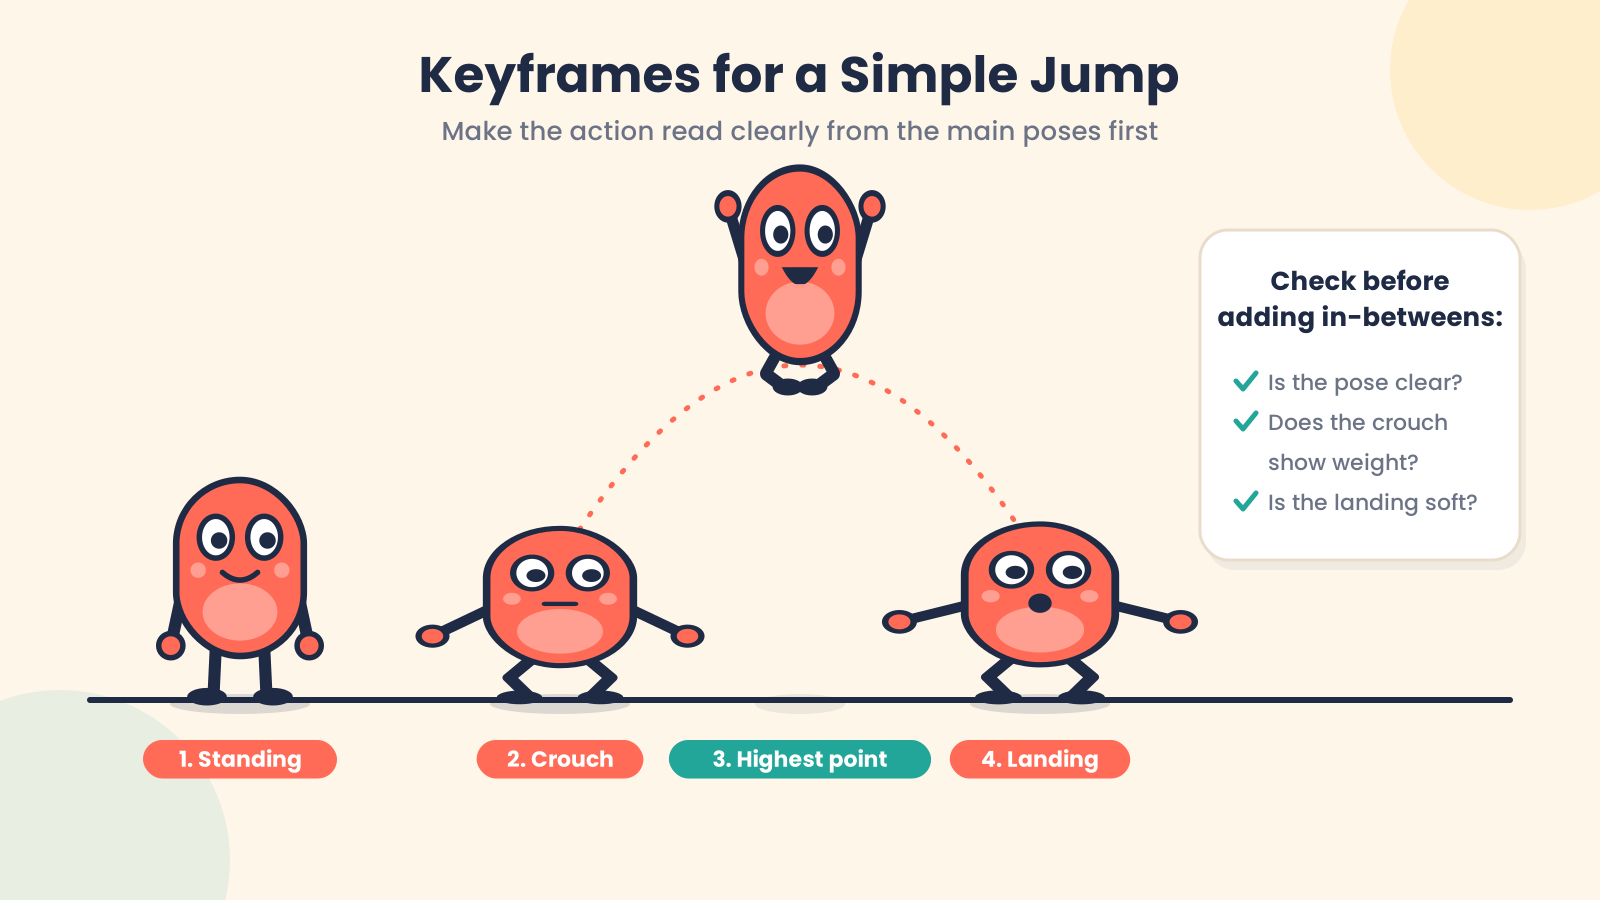
Then draw the key poses of the action. These are known as keyframes. Keyframes are the most important points of the movement.
For example, if a character jumps, the keyframes could be the standing pose, the crouch before the jump, the highest point of the jump, and the landing pose. Before adding more drawings, make sure the action is clear from these main poses.
4. Add In-Between Frames
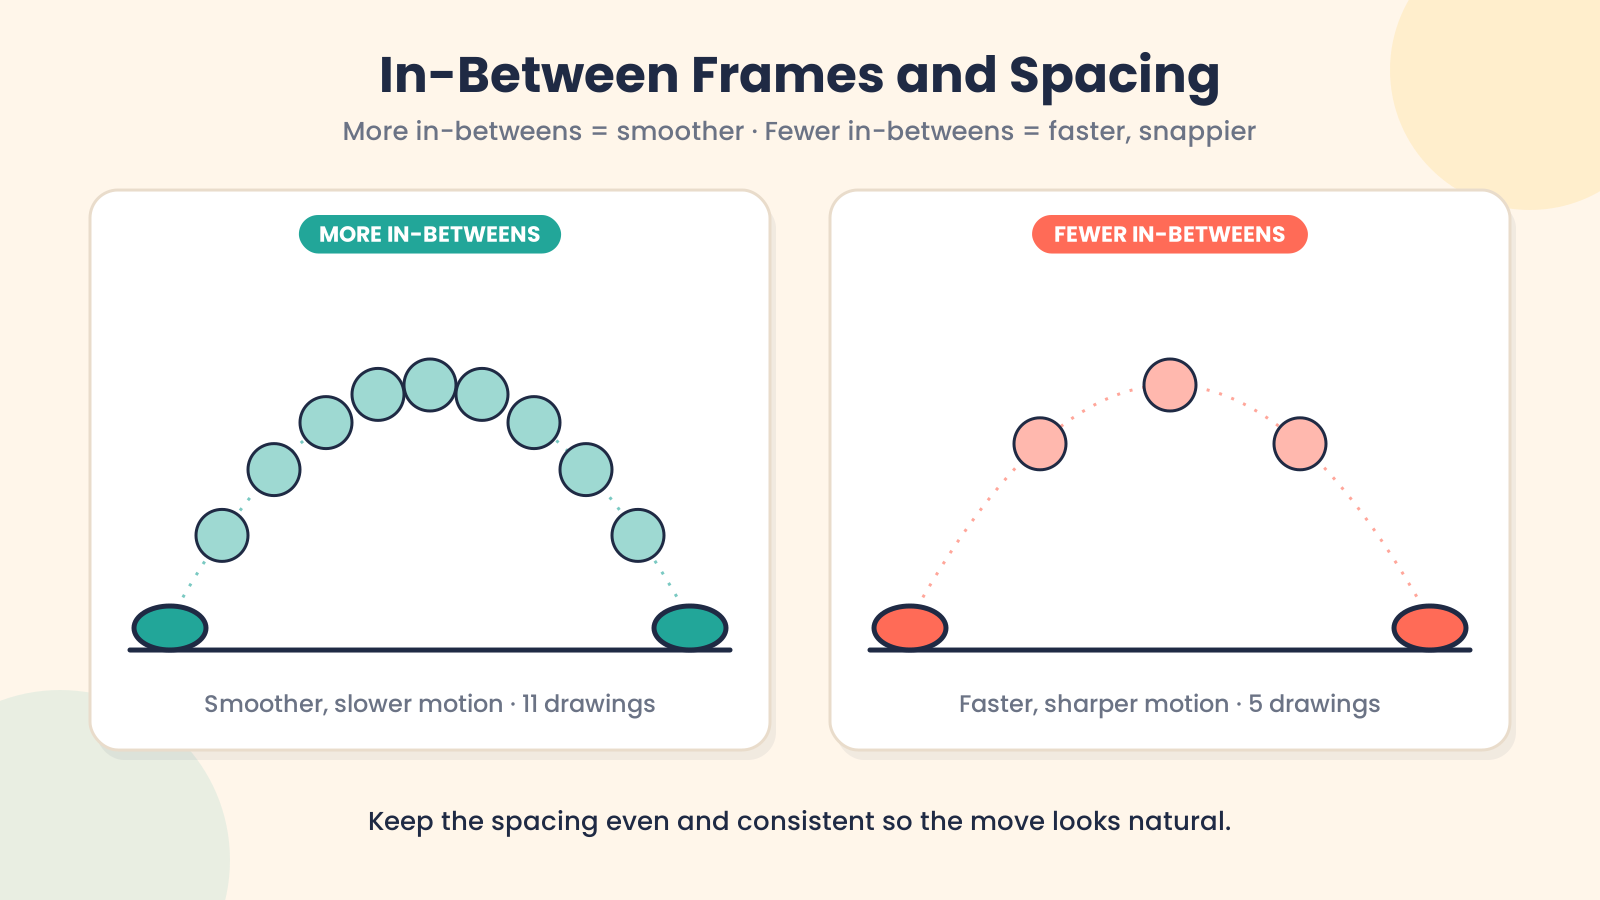
After the keyframes are ready, add the in-between frames. These are the drawings that will connect one keyframe to the next.
More in-between frames usually make the movement smoother. Less in-betweens make the motion feel faster or sharper. Maintain the pace and spacing to make the move appear natural.
5. Review and Refine the Animation
Play the animation over and over again to see the way it moves. Watch for clunky poses, uneven spacing, or extraneous frames.
Don’t just focus on clean drawings at this point. First, check that the motion is working. If you get the timing and movement, you can clean up the rough lines and make the final look better.
6. Export the Final Animation
When the animation is finished, preview it at the desired frame rate. This allows you to verify that the end product is clean and smooth.
Then export the animation in the correct format. For video, you can use Mp4; for short looping animations, GIF, or an image sequence if you need to edit or produce separate frames.
Conclusion
Frame-by-frame animation is the way you create movement by drawing or changing each picture one at a time. When these pictures are shown quickly one after another, it gives the illusion of motion.
To get a grip on this method, beginners need to understand a few important ideas. These include frames, frames per second (FPS), keyframes, and in-between frames. Knowing these helps you decide when things happen and how smooth the motion is. How it feels to the viewer.
If you are just starting out, don’t rush into making character animations. Begin with tasks like a ball bouncing, someone turning their head, or a quick body movement. These small exercises build a base for more advanced work later.
With all the modern tools we have now frame-, frame-by-frame animation remains a key part of both traditional and digital 2D animation. It gives animators control, allows for strong expression, and brings creative freedom that many automated methods can’t fully match.
Frequently Asked Questions
1. Is frame-by-frame animation the same as traditional animation?
Not exactly; traditional animation often uses frame-by-frame, but frame-by-frame can also be digital or stop-motion.
2. What is the difference between keyframes and in-between frames?
Keyframes are the main poses, while in-between frames connect those poses smoothly.
3. How many frames are needed for frame-by-frame animation?
It depends on the FPS and length; for example, 1 second at 12 FPS needs 12 frames.
4. What FPS should beginners use for frame-by-frame animation?
Beginners can start with 12 FPS because it needs fewer drawings and is easier to manage.
5. Is frame-by-frame animation difficult for beginners?
It can feel slow at first, but simple exercises make it easier to learn step by step.

Vandana is a Content Writer and Digital Marketing Executive with 1+ years of experience in SEO content writing, website content, and digital marketing. She specialises in creating engaging, SEO-friendly content, keyword research, and content planning to help brands improve their online presence and audience reach.